It’s common for applications to use threaded comment replies for managing communication. In Vue, we can use recursion to help manage displaying those threads.
What is recursion?
Simply put, a recursive function is one that calls itself with some condition to bail us out to prevent an infinite loop. Here’s an example from Mozilla.
Vue makes it easy to do this, so let’s put together a basic example application to show how it works.
Prerequisites:
- Familiarity with JS
- Familiarity with Vue
It would also help to have some exposure to CSS, as we’ll be adding some basic styles to our app.
Step one: Create a new Vue app.
You can use Vue CLI, Vite, or whatever you’re comfortable with. For simplicity, I’ll just be using the CLI powered by StackBlitz to save us a bunch of local configuration.
From the homepage of StackBlitz.com, click “Vue 3” to create a new Vue app with the Vue CLI. That was easy. There’s a Hello World example to get you started, and we’ll modify these files a bit.
You can go ahead and delete components/HelloWorld.vue and replace the contents of App.vue with this bare-bones example. We’ll come back and improve this soon.
You should now see a simple, unstyled “Comments” heading in the preview pane of StackBlitz, like so:

Step Two: Get some comments.
You would commonly get this from a service, but we’ll provide this as hard-coded data for our tutorial.
Let’s create a new folder at src/data for our comments and export some data into a new file at src/data/comments.js. You can paste this in from StackBlitz.
This data includes the comment author, content, dates, and replies. The replies are comments in the same format, with identical fields. Knowing these fields will help us create the Comment component in the next step. No need to get in the weeds on the data for now; we’ll look in a little more detail as we go along.
To get the data into our application, let’s go to src/App.vue and import our data at the top of the script section.
Then we’ll get that data available to Vue by adding comments to the computed properties and returning the comments data. We might typically use the VueX store or grab our data directly from an API, but we’ll keep things simple today.
Our script section in src/App.vue should now look like this:
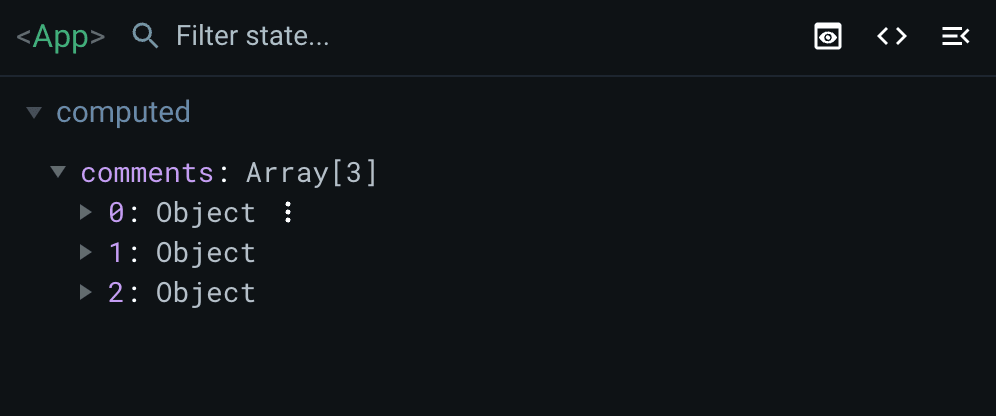
Now, if you look at App.vue in the Vue Devtools, you should see your comments array. (If you don’t already have the Vue Devtools extension installed, you can download it here). Feel free to look at the array in more detail while we’re here.
Step Three: Create a Comment component.
Next, we’ll need a component for each individual comment. Let’s create a new file for the component at /src/components/Comment.vue and fill it with this boilerplate for now.
Now let’s add that to App.vue and render the basic comment to the application. We’ll import and register the Comment component in the script block, then add the <Comment /> to the template. Our App.vue should now look something like this:
With our unstyled output, we should now see the comment header with a single comment below, like so:

Step Four: Add data to comments.
Let’s review our data again to see what we need to pass into each comment. In Vue Devtools, we can see we get an id, author, body, timestamp, and an array of replies. The UI will need the author, body, and timestamp. We’ll also need the replies to display threads in a later step. Let’s put some props in our Comment component to receive that data.
After adding some basic prop validation, our script block should now look like this:
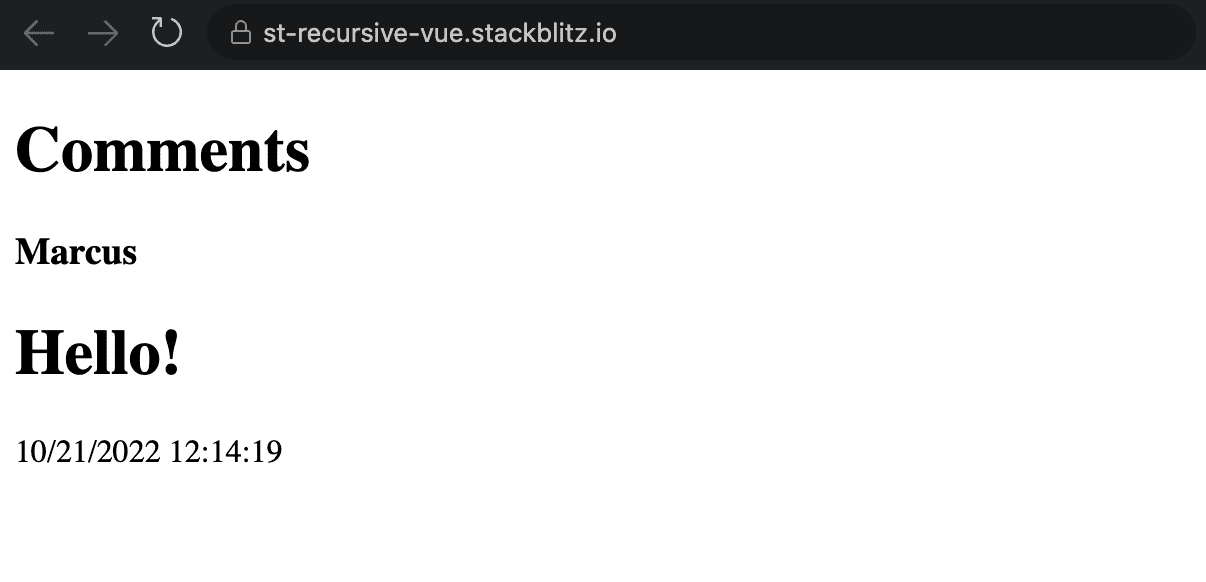
Next, we’ll add some markup in our template to render that data. Note that we use the v-html directive for our body since it contains HTML.
If we hardcode some props into App.vue, it should render our comment data as expected:
But we don’t want to hard-code each comment, so let’s use the v-for and v-bind directives to bring the data to life instead.
One great thing about v-bind here is that since we named our props in Comment the same as the keys in our data, we don’t need to list every prop out here. We can bind all the props to the comment in one quick swoop while taking advantage of prop validation in our component.
With luck, our comments should be listed out like below.
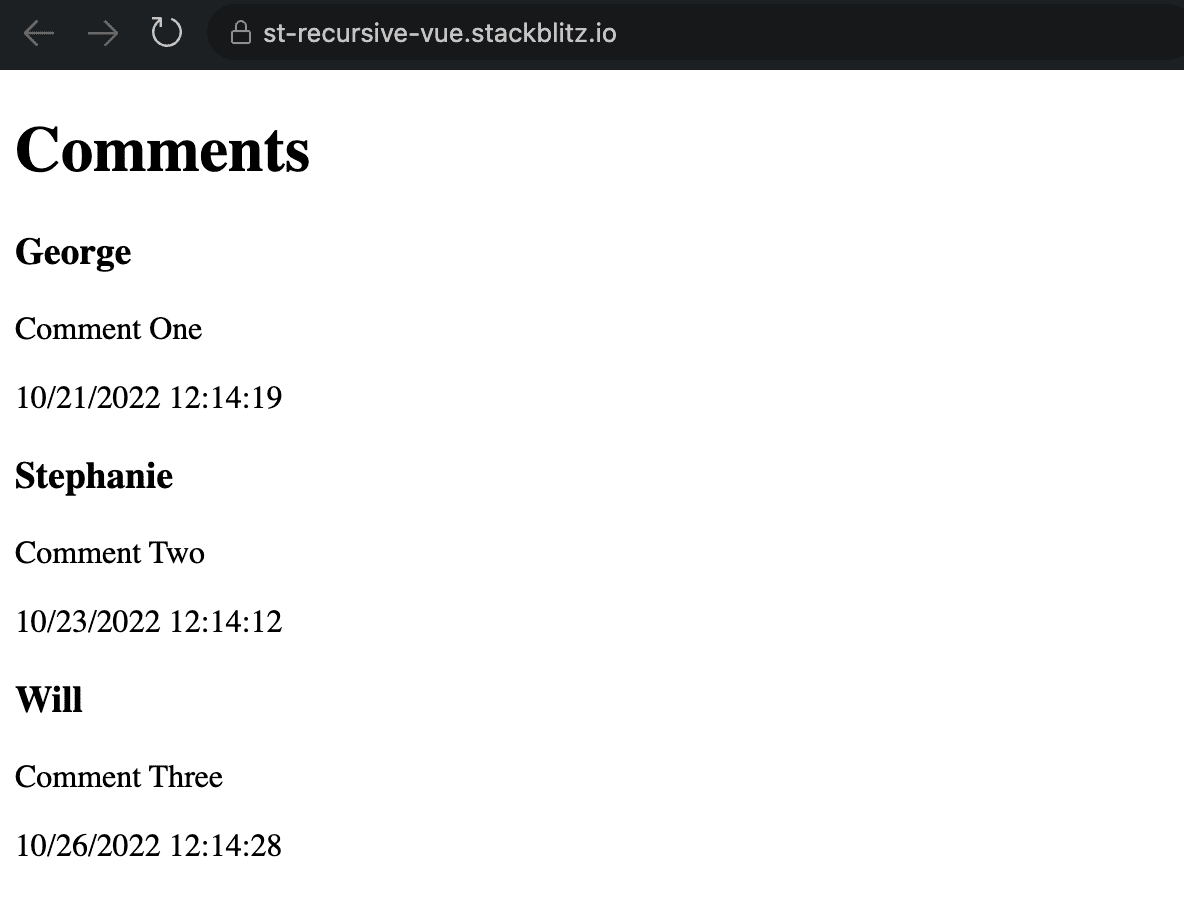
As you can see, this is just the first level of comments and doesn’t include the reply threads! We’ll add those soon, but let’s optionally get some styles in here to make this a little easier on the eyes.
Step 4.5: Add some styles
This step is optional but will help make our comments look a little better, and we’ll also be able to visualize the threads easier.
In App.vue, we’ll add a few global styles. Note that we don’t use the scoped attribute on the style block because we want all components to inherit these changes.
Then in Comments.vue, we’ll make a couple of quick changes.
First, I added a comment icon inside the header.
I also added a computed property to make our date more readable. No need to get into the weeds on this one; it’s just something I grabbed from the web:
And then replaced the simple timestamp with our formattedDate in the template and added a class name to target styles. I also added a class name to the body prop.
And lastly, here’s some basic CSS to clean things up a little.
With those changes, that should be looking better.
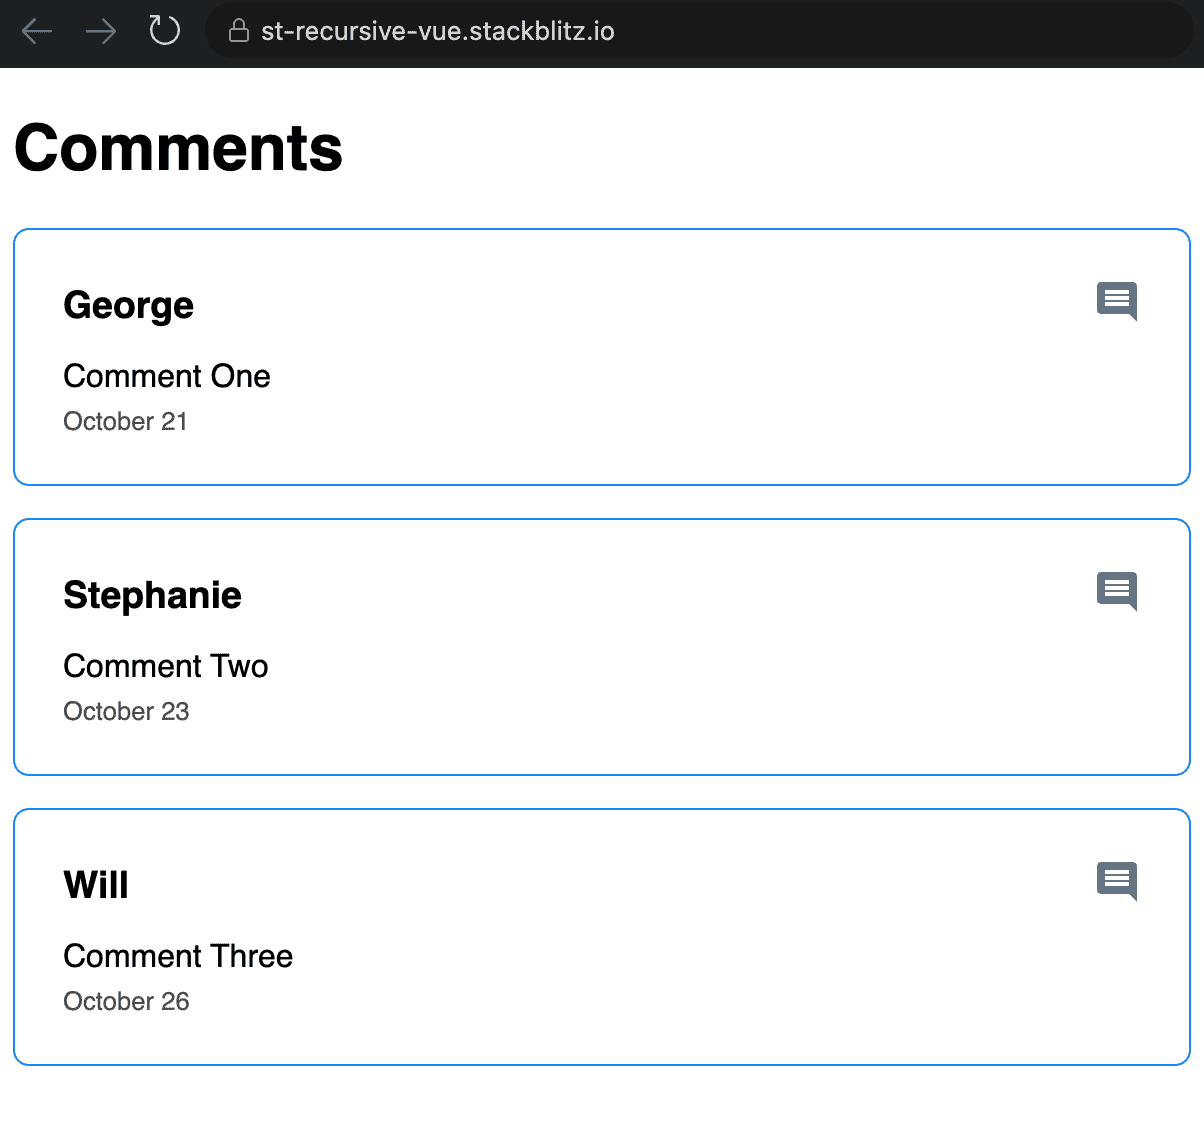
Now that we’ve got the setup out of the way, we can start getting into the threaded replies.
Step 5: Use recursion to display replies.
If we look at our data again, we can see that each of our top-level comments contains a replies array. If there are no replies, the array is empty; otherwise, each object in the array contains another comment with the same shape as the top-level comments.
Back in our Comment component, let’s add a check to see if there are replies and if so, render out something to prove it.
I’ll start by wrapping our entire template in a single div so that comments and replies can be treated separately. And then, after the comment, I’ll render out the word “Replies” if there are indeed replies.
Your Comment template should look something like this now.
And we should see the word “Replies” under the first two comments since they have replies.
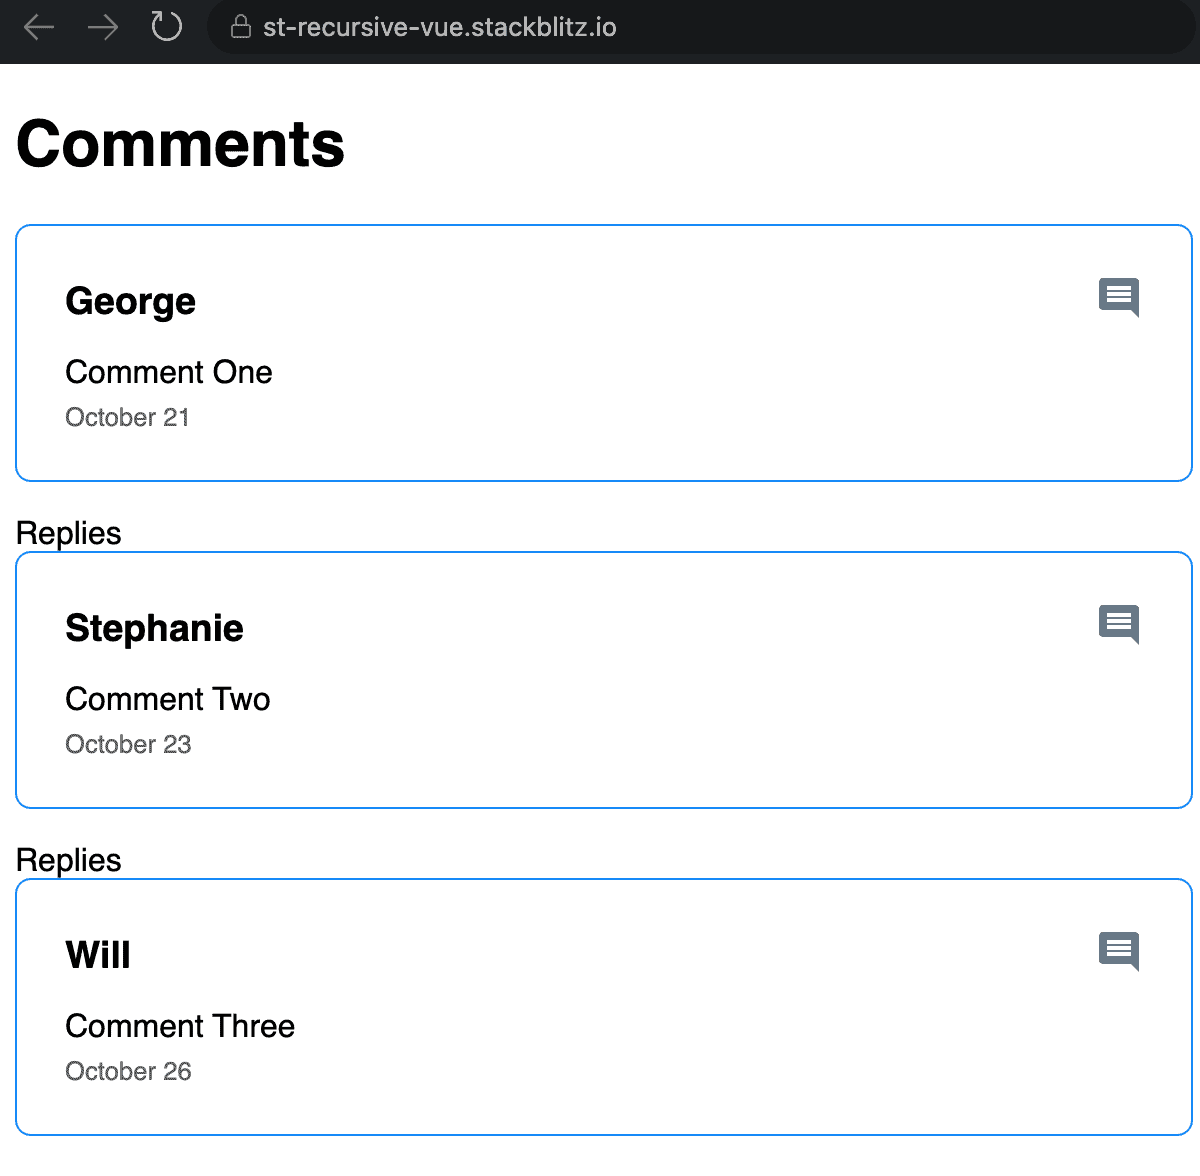
Now here’s where the benefit of recursion comes in. In Vue, so long as you named the component (which we did during setup with name: ‘Comment’), you can call it from within itself, just like any other component. This will make rendering our replies super easy.
Inside the .comment-replies div we just created, let’s replace the plain text with another Comment loop, just like we used in App.vue.
And just like that, we have replies showing up!
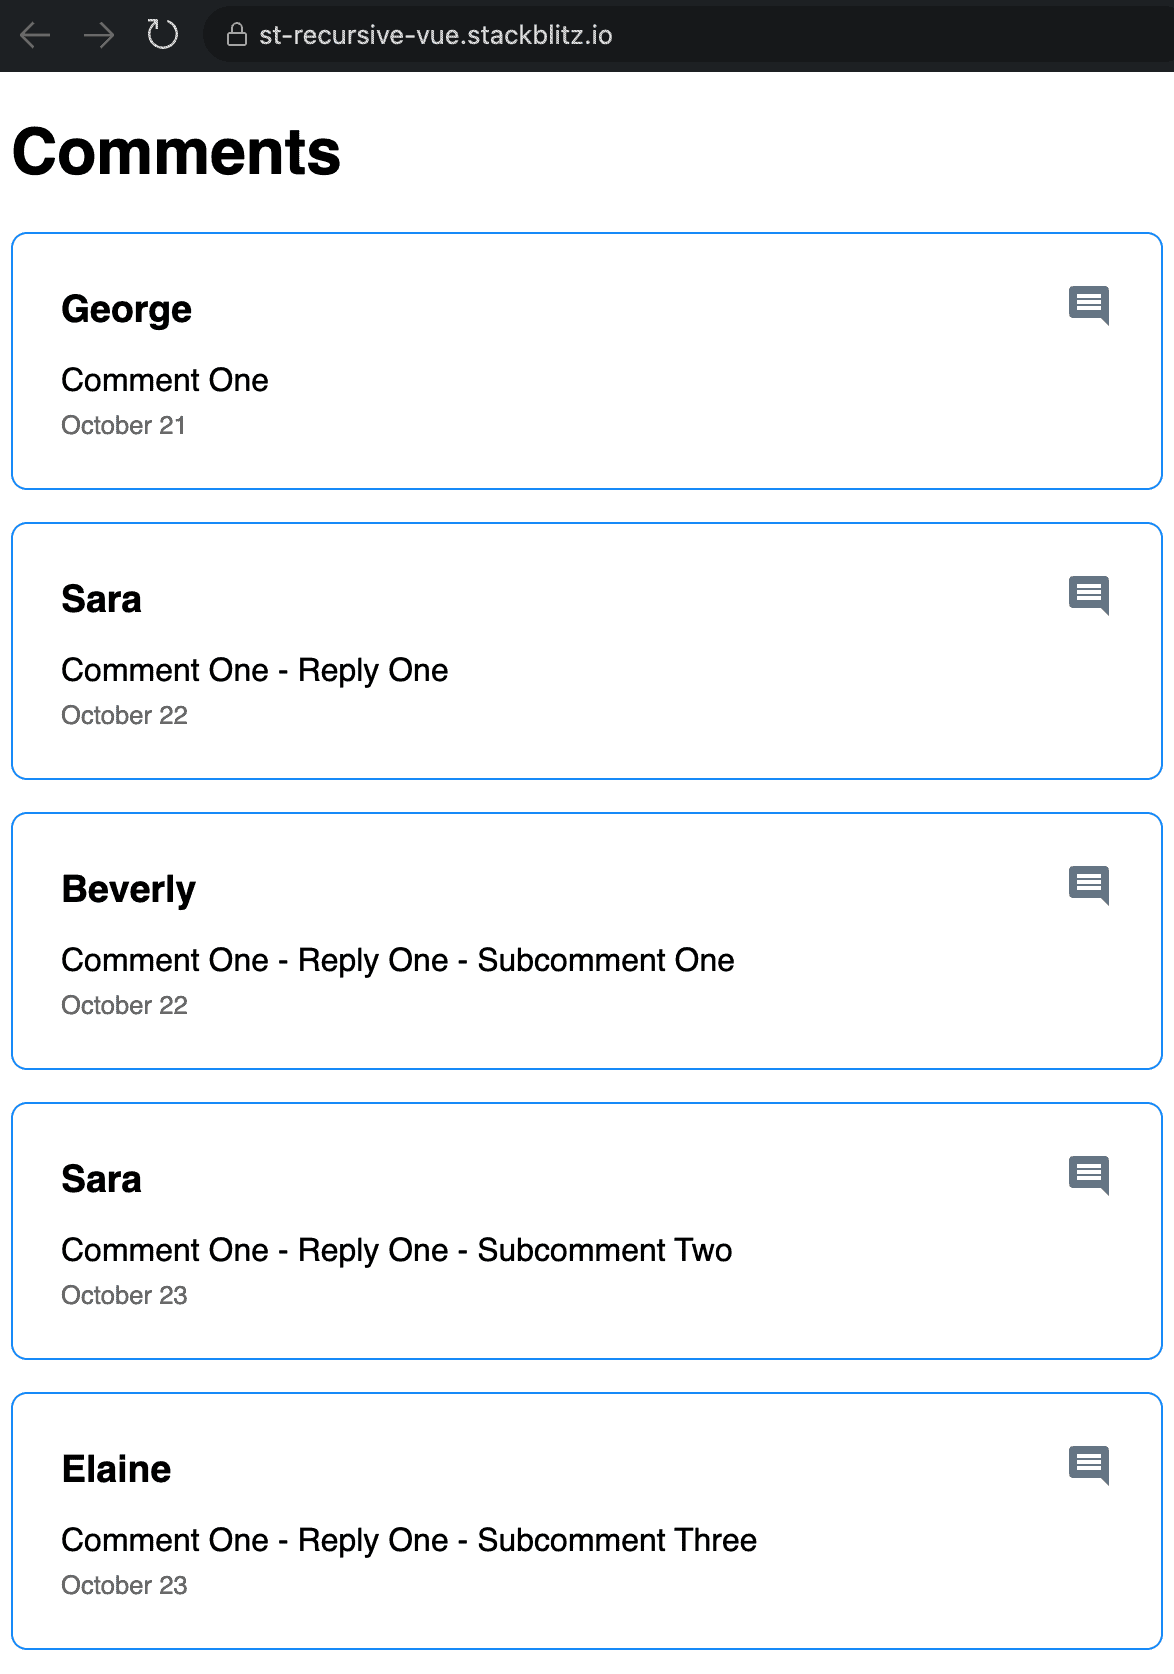
Using recursion to show those replies was super easy, but as we can see, there’s no great visual cue that we’re looking at nested replies. Let’s add some styles to help with that. To start, we’ll add some left padding, which sets the replies apart nicely. We’ll come back and add a little more later.
And because padding gets applied at each level, we get the immediate benefit of another level of visual nesting for free.
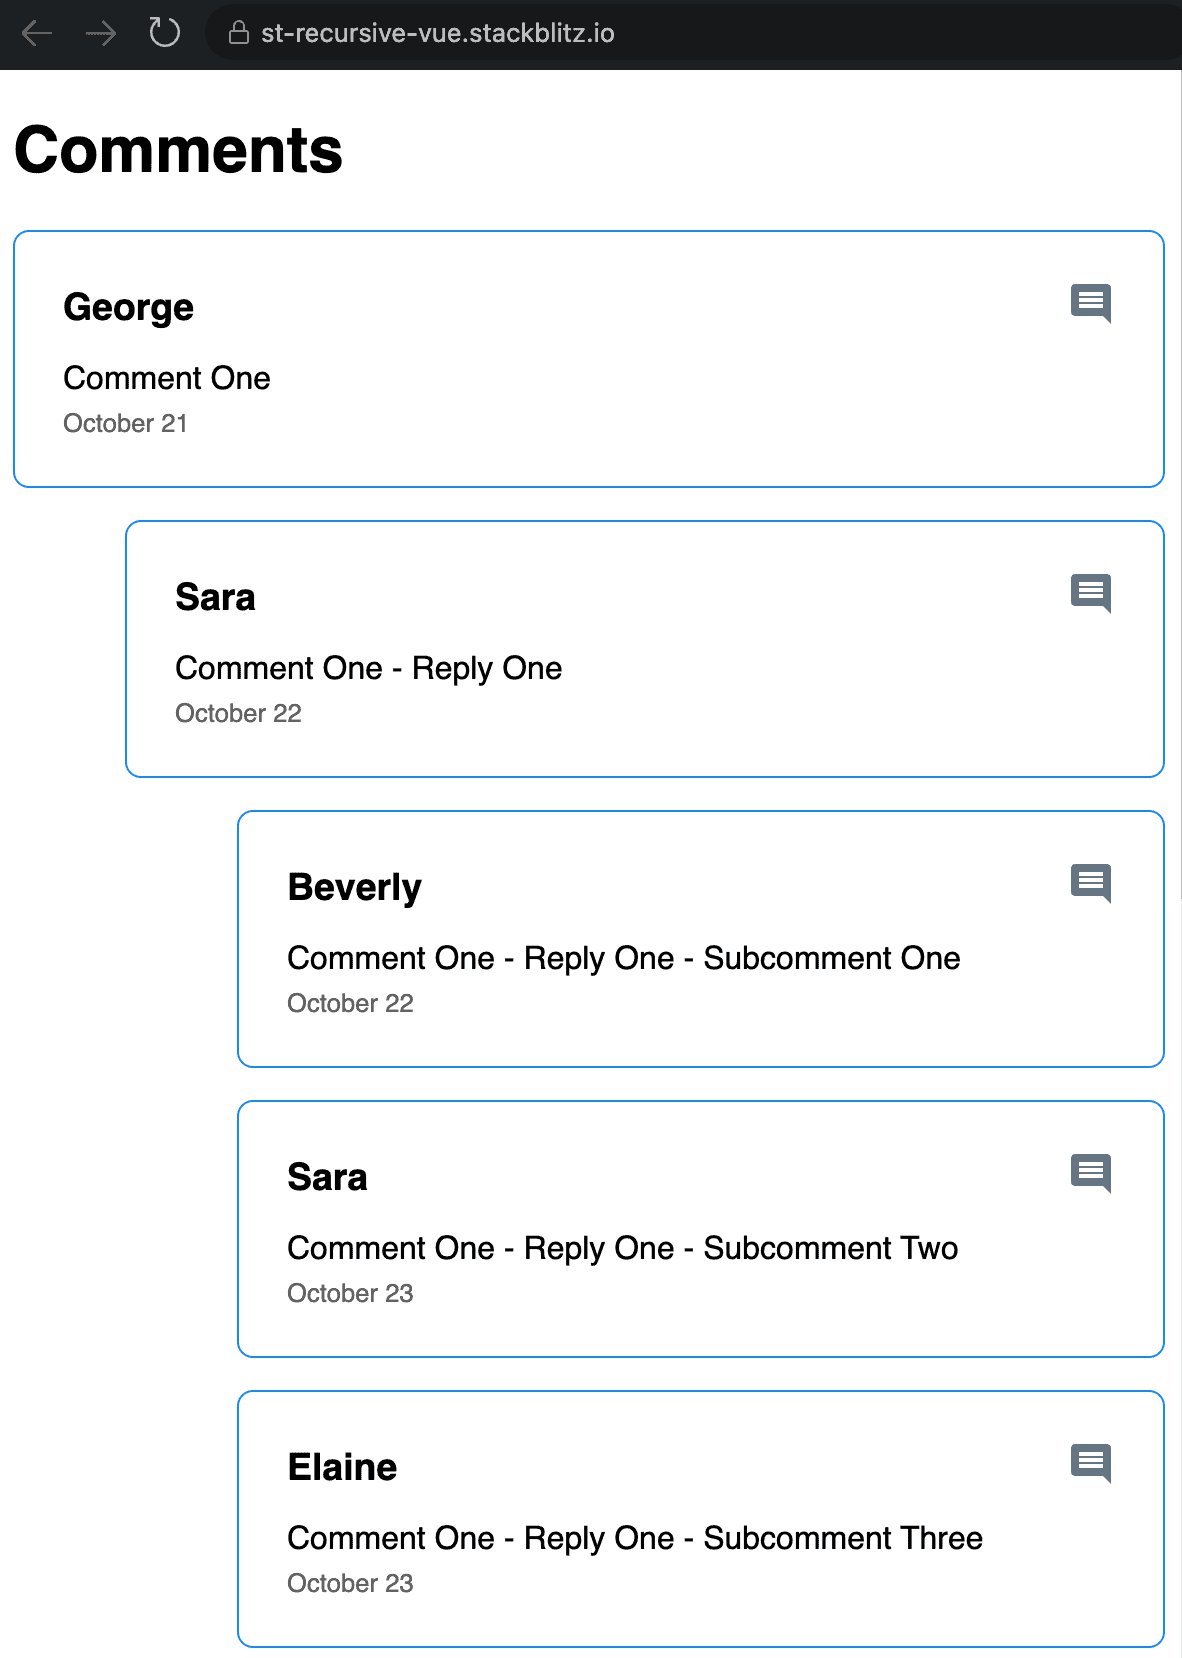
And now we’ve got a working comment thread tree! You can have as many nested levels as you’d like, though, for a straightforward user experience, we recommend not going deeper than two levels if possible.
We could stop here, but I’ll add a couple of other UI improvements to spruce things up.
Step 6: UI Bonuses.
Wouldn’t it be nice if our icon changed based on whether a comment was first-level or a reply? There are several ways to accomplish this, but today we’ll use a computed prop to determine which SVG string to use.
First, we’ll add a new prop to our Comment component to receive a comment type. By default, this will just be the string comment to note a first-level comment.
Then, in our recursive calls to Comment, we can pass a different type of reply to override the default.
Now that our Comment component knows more about itself let’s act on that by rendering a different icon for replies.
We can choose which icon to render in a computed icon prop based on the type.
And in our template, we can render the icon (I’ll do so in a span for simplicity).
That looks better, but just one last thing. When there are many threads and replies, keeping track of where you are can be challenging. Using CSS pseudo-elements, we can add some lines to help keep things consistent.
Let’s update our Comment CSS:
Next, we’ll add a quick tick to the Comment if it’s a reply. So in Comment.vue, let’s add a reply class to replies and another pseudo-element to add the tick.
And in the CSS:
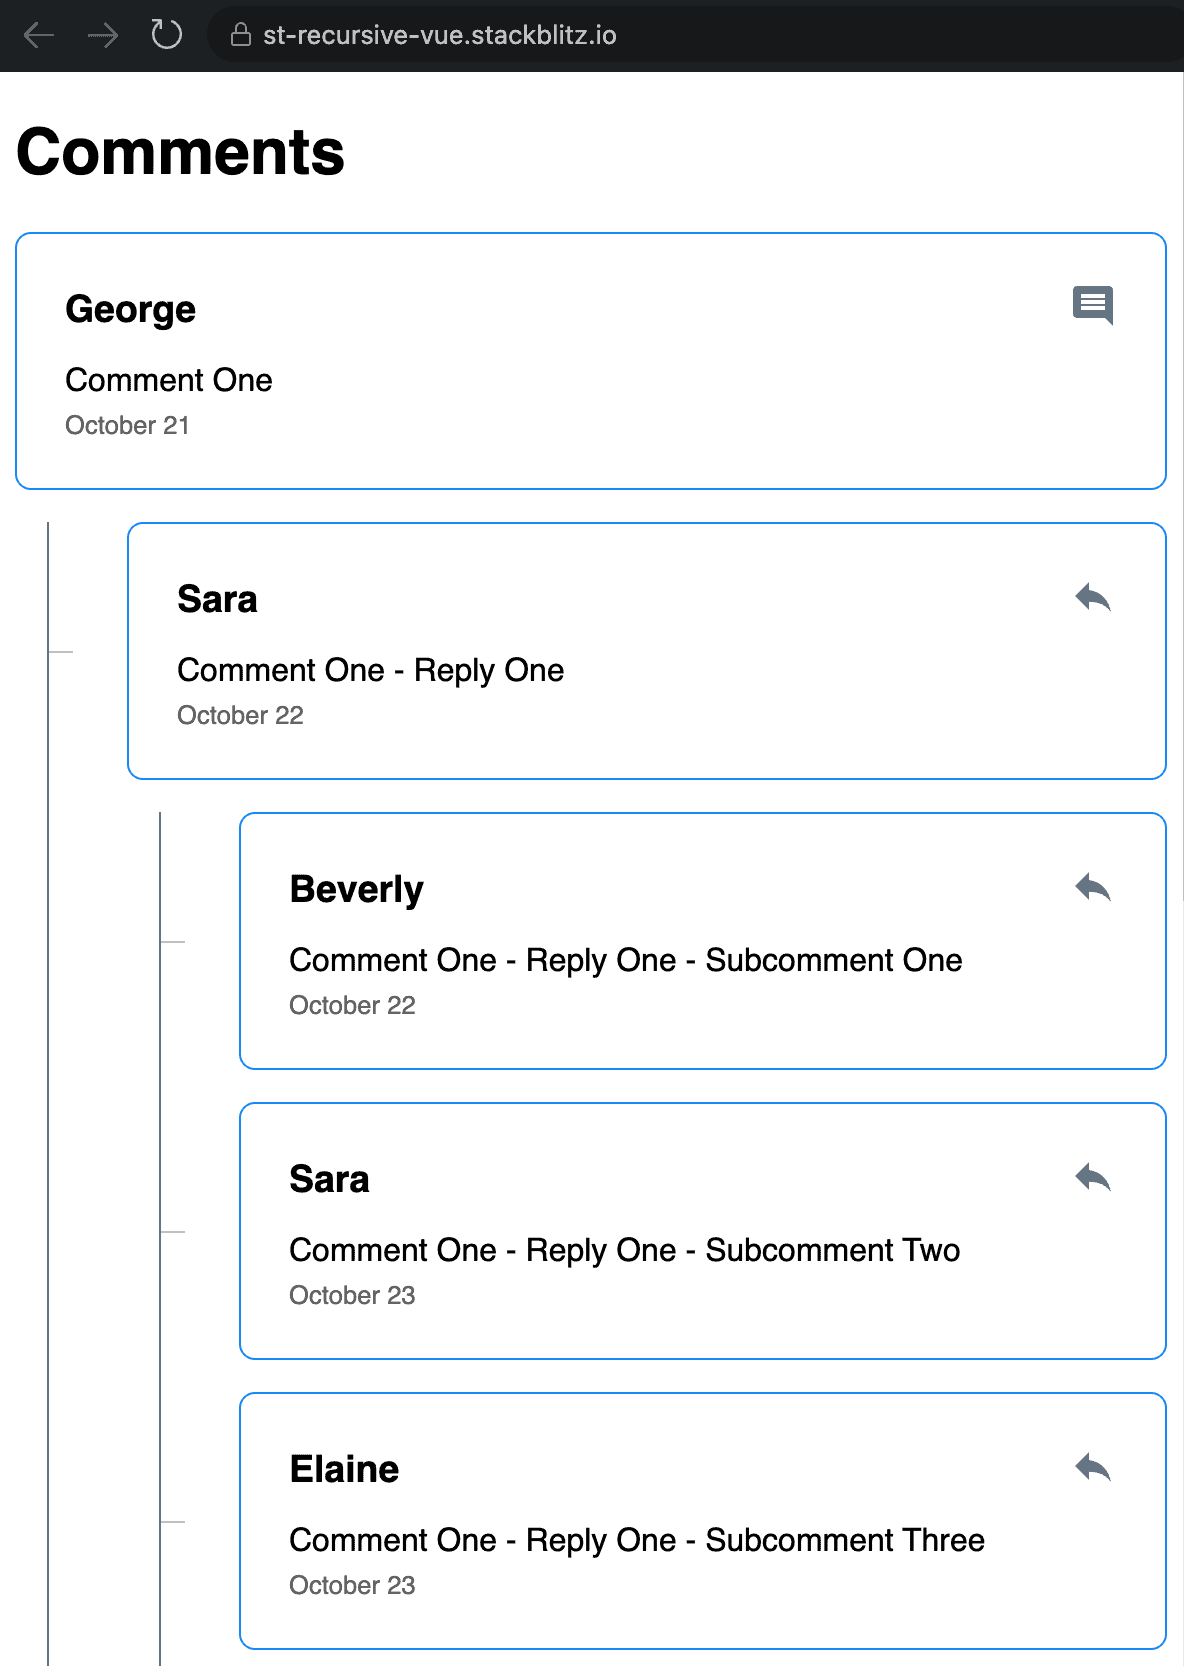
And now it’s much easier to visualize which replies belong to each comment.
This somewhat confusing scenario was made easy with recursion. You can play with a working example at StackBlitz: https://stackblitz.com/edit/st-recursive-vue?file=src/App.vue.
I hope you found this example to be helpful. Let us know in the comments how you use recursion in Vue or JavaScript, and have fun building!
Loved the article? Hated it? Didn’t even read it?
We’d love to hear from you.


This article helped me a lot. Thank you!
Thanks..
It helped me a lot..
Exactly what I was looking for! Thanks!